Have you bought all your skateboard parts, beautiful deck, Quality truck, wheel, bearings, etc.? So, of course, now you want to know how to assemble a skateboard.
Let me tell you that if anybody wants to assemble its parts by himself. It is not a big deal; even it can be done in very little time. We will help you in a few simple steps. All you have to do is to follow over instructions, and it all will be great.
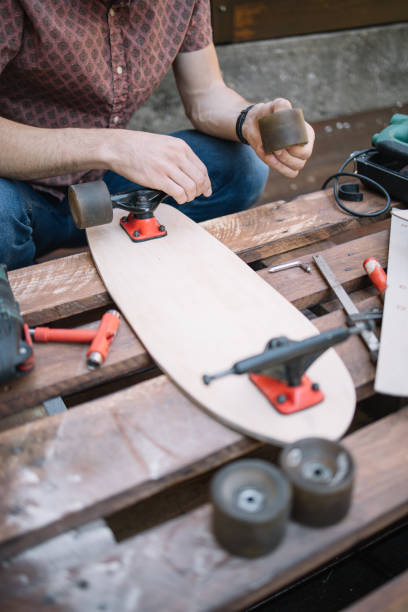
I hope you keep all the tools and parts of your skateboard in a ready position. Now apply the tape on the deck, add bolts, and make the holes. Fix the riser pad and truck and attach nuts.
Now pick up your wheel and put the bearing in it, and fix(attached) the wheel. That’s it, and you are done. I hope You enjoy doing it and even it did not take you more than 30 min.
Best Skateboarding tools kit:
How To Assemble a Skateboard
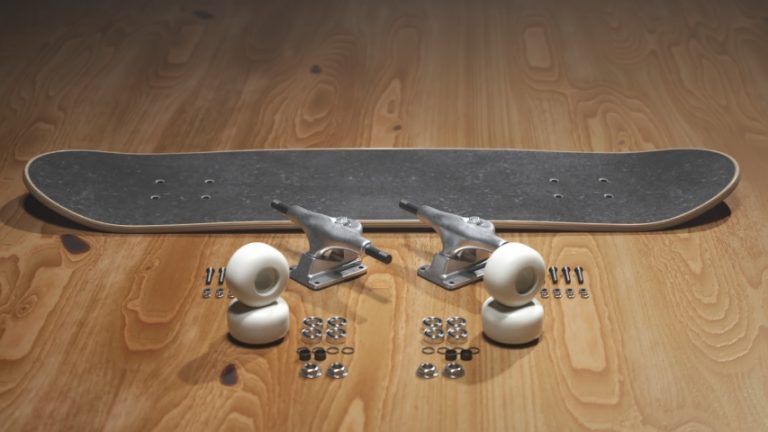
Match the checklist before assembling your board.
- skateboard deck
- Grip tape
- Trucks pair
- Four wheels
- Bearings
- Riser pads
- Four spacers
- Eight bolts (to fix trucks)
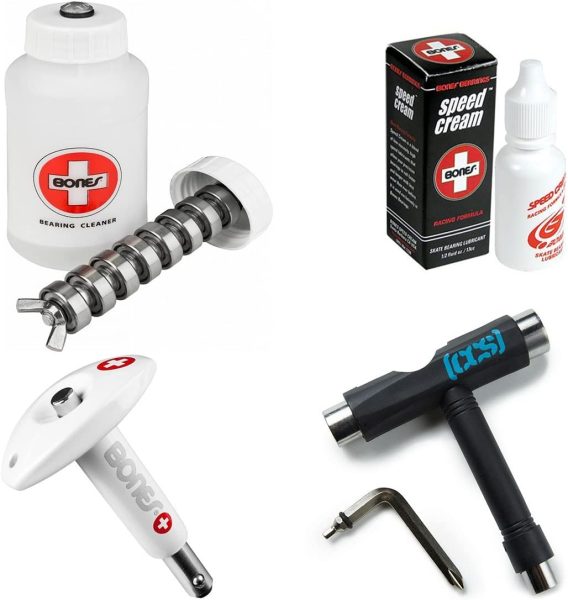
- 9/16″ + 3/8″ 1/2″ + wrench
- A skate tool
- Screwdriver
- Stanley knife or razor blade
- Two riser pads (it’s optional)
Please don’t be lazy and never ask your nearly skateboarding-related shop to assemble them for you. We encourage you to get it done by yourself💖.
You feel amazing fun by doing it. Secondly, always order all the things once. It will reduce the cost of extra shipments and save you money.
It’s time to start building your board

I hope you have bought your skateboard components and keep them ready. Assembling a board isn’t difficult, but it’s fun. Make sure there is a tool kit or some useable tools on hand. Having all the equipment with you is great. In case you have any missing tools, be sure to manage the ones listed below.
- If you have a Phillips screwdriver, use it or an Allen wrench 1/8′′
- 9/16″, 3/8″, 1/2″ wrench/socket
- 1/8″ and 7/8″ size wrench,
- knife or razor blade
Wrapping the deck with Grip tape
Your only challenge will be applying grip tape to your deck. Newcomers and those doing it for the first time may find it a bit challenging. However, you also have to be extra focused and pay more attention to it, which is not a big deal.
Once you’ve done it yourself, you feel more confident and happy.
- Always make sure grip tape properly covers your deck. As compared to narrow boards, it is more challenging for 8.5″ and over.
- You should need to be more focused while fitting a standard grip tape
- Completely remove the grip tape and place its end at the nose of the deck and check whether it is aligned or not.
- After tapping the grip tape, apply it slowly from front to back of it. While doing this, keep your thumb on the ending point of the deck and keep all the other sides of the tape angled.
- Use a screwdriver or any other blunt alike object for scraping its edges. For making a thin and fine line, you have to do it quickly. It also helps you create a great cut.
- With the help of a knife or razor blade, please make a small cut on its edge.
- Puncture the tape in the ending point of the deck. And keep the angle of your blade towards the skateboard deck. Now you have to move it by keeping it in the right direction to get an excellent cut.
- It ensures you are using the rough side of the remaining Grip tape by rubbing its edges properly. Moreover, it keeps the grip tape from spoiling and keeps the deck in good shape.
- Punch a hole where you want to fix bolts. Later, for the easy attachment of bolts, turn the deck on its tape side while pushing the hole by turning your driver back.
Avoiding Air bubble
While applying the grip tape on your deck, give the angle to the tape toward yourself. Now You are slowly releasing grip pressure and moving backward. Never slide your finger or hand because it can damage you. It depends on the tape that you are using.
Now slowly swipe your hand from front to back or vice versa. It depends on which position is easy for you. I hope doing it will never raise any bubble, but if You notice any drop, take off the grip tape and try again.
Don’t worry, and grip tape does not stick quickly. It takes some time. Even if you need to completely remove it and apply it in the correct position, you can do it.
Because of the concave nature of your deck, the grip tape is difficult to apply. When you press the grip tape down to where it’s lying flat, there will be air pockets in the middle. Since these aren’t a problem, punctures can be performed.
You need to be patient, the appearance is likely to go unnoticed. You can always pop it back into place. No one will notice.
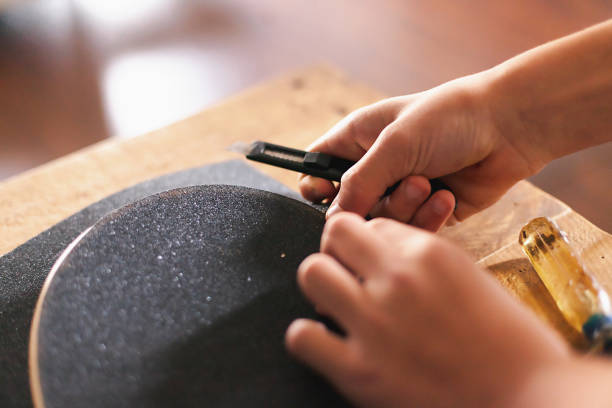
Scraping the Edge

It’s a good idea to scrape the grip tape to make it thinner. It will allow you to get a perfect grip. Do not pull your tape more than once. One quick and firm scrape will do.
A thicker line will allow your sharpener to move more freely and will result in a consistent edge. I’m not a big fan of uneven edges. Repeated mistakes or inconsistencies may get in the way of your grip, don’t worry, except for a few.
It works fine with a blunt object, such as a screwdriver, but some people prefer to file it instead. The handle should be close to your edge in order to apply pressure more precisely, which will result in a very sharp line. Almost anything blunt, like a screwdriver, will do.
When using a screwdriver, always point it towards yourself. By doing so, a thin hard line is easier to draw.
Pull up the tape after making a cut
Take a knife and make four cuts on each end of the tail and nose, near the curve. Once you’ve cut the pieces, make another cut over the line so you won’t run into problems cutting it again.

Consider the scenario where you are lifting your grip tape as you apply it. Your hands are no longer sticky with the new grip tape, drawing it is much easier.
Don’t worry if the edges of the paper need to be peeled off. Remove it very gently by peeling it off. There is still the option of using a sharp knife to get it off.
Grip tape cutting
I am now going to cut this grip tape, which is going to be scary. It is crucial that you cut in the direction you intend to go. You will end up making inconsistent cuts if you cut away from yourself. The opposite seems more likely to happen against you since you’re in control.
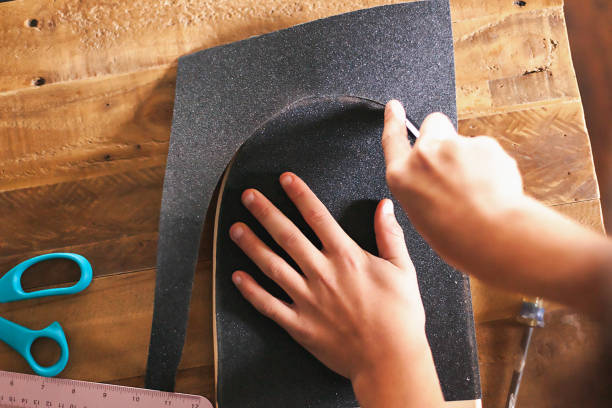
You should always keep your blades as sharp as possible. It will make the process a lot easier. The first time I tried it, I had an unsharpened blade. Even after cutting grip tape, consistency can still be fixed.
It’s time to cut your tape! You can start cutting by puncturing where the tail meets the nose. Be sure that you are pointing your blade at the deck.
The razor blade you are using. Make your cuts steadily and solidly by resting your index finger on the deck. Continue cutting. While cutting, you should go a little backward to get around your deck and start cutting again once you reach the other end.
After you’ve gotten to the tailor a nose of your board, take it up. Put your blade into the same place you left it. It would help if you prevented the deck from moving by pressing your hand against it. And then make the curve by slipping the board outwards. If you’ve never done it before, you won’t be able to make the turn.
Once you’ve turned, keep cutting in your direction until you reach the end of your deck. Once you have turned the deck, continue cutting. As soon as possible (once you’ve reached the tail), remove the grip tape from the board. The work is done.
Install the bolts
Your grip tape is done. Once the holes are punched, you can now insert the screws. The time has come to pierce the hole if you haven’t done so already. Puncture the hole. There will be no problem with this.
Get a screwdriver and stick it back into the holes, which will make the process a bit easier. Alternatively, you can simply push back the grip tape using bolts.
To make the holes, you need tools.
Assemble the riser pad
For those people who do not have riser pads, they can skip ahead. When you determined the riser pads’ size, you chose the proper bolts. I don’t need to explain this in great detail. It’s just a matter of fitting the trucks.
When you have the right tool, all you need is common sense to succeed.
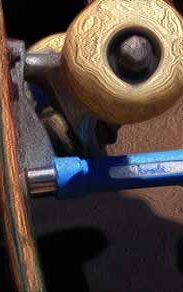
Fix the truck now
The trucks need to be attached now. To attach them correctly, you simply need to be aware of their placement. Face the kingpin toward the inside. Otherwise, you’ll have an uncomfortable ride. It’s not something I’ve tried, honestly, but I guess you won’t see any benefit from this.
Ensure that the bolts are tight, otherwise, you will be able to feel them while doing tricks such as ollies and shuvits. By sticking out the bolts, your shoes might get damaged, and in the worst scenario, you might get cut.
Follow these steps the same as I do to assemble it.
- Trucks should be positioned on bolts.
- The other side of the bolt should be locked with a screwdriver while tightening the nut.
- Fingers are best for screwing bolts, so go ahead and use them.
- You still need to tighten the screws, so get your driver or Allen key to tighten the screws from the grip side.
- When using a 1/2″ socket wrench, the nut is locked and twisted using a screwdriver.
- Ensure that the baseplate is not able to be moved.
Attach the bearings and spacers to the wheel
Be confident this part is quite easy. Follow this given procedure to attach them with the wheel.
- First, you need to put a bearing on the wheel. You can simply push them into place by hand.
- Then, mount the bearing and wheel to the axle of the truck by applying pressure. Some pressure might be required; just don’t go overboard with it.
- Then, insert a spacer. It just needs to be slipped on the axle.
- Secondly, attach a bearing, and then press it in.
- Take the wheel off, rotate it, then place it back. The bearing will pop into place once the pressure is applied. Now move to the next step
Attach your wheels
It’s easy, all you have to do is make sure the axle nuts on your truck are loose. You may lose bearings if you do. Keep your speed rings and washers attached because they prevent wheel bearings from being damaged, as well as allow them to spin. A skate tool is required to do this.
- On the axle of your truck, attach the washers.
- Install the wheel. A little movement of the spacers could cause an axle blockage. If you move it a bit, your wheel will be in position.
- The washer should be placed outdoors.
- The nut of the truck must be attached and held in place. A little bit. Hopefully, the wheels will still spin.
How To Assemble A Skateboard – Video Guide
Wrap up
Thanks for reading how to assemble a skateboard, If you read this article and use the information contained in it, you should be able to assemble your board by yourself.
Enjoy. Good luck.