Skateboarding allows you to create your very own small skatepark by allowing you to construct several fundamental parts, obstacles, and features. This is one of the many benefits of skateboarding. This article will help you to understand how to build a rail for skateboarding.
If you have a half-pipe, a bank ramp, a pyramid, a fun box, and a skateboard rail in your backyard, you will have everything you need to pull off even the most difficult skateboarding tricks. Skateboarders can slide or grind in public areas because of the prevalence of railings, making it possible for them to practice various techniques.
What if, on the other hand, you could have a stable and movable structure that could be erected outside of skateparks?
How Simple It Is to Build A Rail For Skateboarding
It does not take rocket science to construct a simple grind rail for skateboarding that can still be ridden. In an ideal world, you would construct a building that is robust and strong, lengthy, portable, and easy to move around. In addition, it must slide and grind without any issues and maintain its position at all times for the performance to be at the next level.
A few different do-it-yourself grind rail models may be found online. You can construct a one-of-a-kind street grind rail for yourself or come up with a version that is analogous to one typically located at skateparks. Finding a pipe or flat bar that grinds effectively and a sturdy framework that can sustain all the weight that will be applied is the challenge.
One of the things that most skaters dream of having in their backyard is a mini skatepark complete with a rail and ramp for skateboarding. Skaters frequently perform tricks on railings due to their prevalence in skate parks and the fact that they are the most prevalent obstacle.
In this piece, I will go over the steps necessary to construct a skateboard rail and answer your question, “How to build a rail for skateboarding?”. You will not have any trouble understanding the directions, and it is possible that you already have all of the components at home. If this is not the case, however, you may head to the retail establishment that is most convenient for you or shop online. Let us start.
Required tools
- Steel pipe: To ensure a reliable and long-lasting rail, we advise selecting a zinc-coated metal pipe.
- Size of Steel Pipe: The rail is 3 inches in diameter and 72 inches long.
- Legs: 12 inches in length and 4 inches in diameter.
- Feet are 3 inches wide and 10.5 inches long.
- Welding equipment, such as welding machines and welding rods, generates heat that melts steel and enables it to be joined. The welding rods’ exterior flux layer shields the steel from taint. Additionally, it improves and stabilizes the weld quality.
- Safety or welding goggles: To shield the eyes from UV light, piercing heat, and flying debris while welding.
- Metal-cutting saw: for slicing pipes and other metal components.
- Measurement tape is used to determine size and distance. It is crucial to gauge the length of your rail precisely.
- Pencil: To indicate with the tape, measure the appropriate length.
Step-by-Step Guide to How To Build A Rail Skate
Welding will be used to link the various components of the rail. It is like planning how you will put together your legos. You may be able to complete the task independently; however, if this is different from the situation, you can work with a professional welder or a buddy with previous experience working with welding equipment.
Step 1:
First, assemble the necessary materials. Determine whether you will use round or square tubing while putting up your handmade skate rail. After that, get all your materials together, and we will start the procedure.
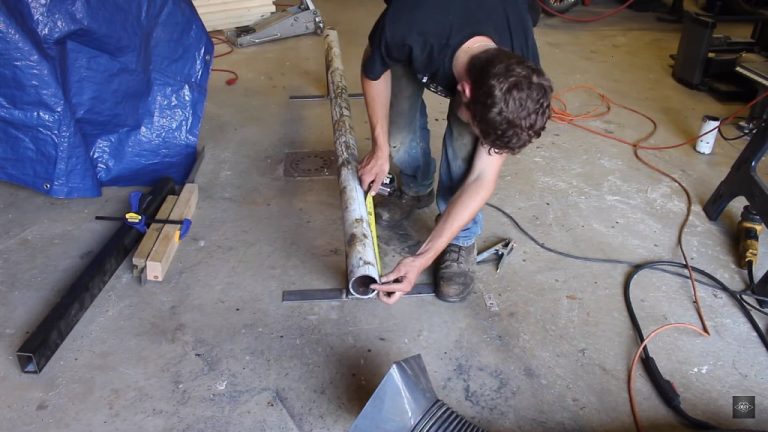
Prepare the tubing for the railing in Step 2. After taking its measurements, a pipe with a diameter of three inches that is 72 inches long can be cut with a metal working saw. This tube will be used for the railing that you are creating.
Prepare leg tubes for use in Step 3. Take measurements using a circular or cylindrical pipe 12 inches long and a width of 4 inches. This will serve as the leg of the skate rail you are building. Construct two tubes, as there will be two legs supporting the rail.
Step 4: Get the rail’s feet ready for installation. One flat piece of steel should be measured to be 10.5 inches in length & 3 inches wide. Perform this action twice to give yourself two feet. Put them to the side because later on, the legs of the rail will be supported by them.
Step 5: Position the legs and make a mark on the feet. First, using a pencil, mark the center of each foot. Next, position the legs, making sure that they are perpendicular to the feet and that they are correctly aligned and centered.
Step 6: Join the lower extremities by welding the feet and legs together. The next step is to join the legs to the feet by using a welding machine and E7018 welding rods and doing it safely.
Attach the rail to the legs as the seventh step. After positioning the iron rail pipe on top of the legs, use the welding machine to attach it in place securely. You can raise one leg above the other. You will be able to create slanted designs with its help.
Let us try the skateboard now. If you read the following material and complete everything, making a deck rail for skateboarding will be easy. Building your skate rail is an excellent option if you want to improve your skateboarding abilities and save time by not traveling to a skatepark so often.
Built Your Flat Rail For Skateboarding
You may want to add a flat bar to your skate setup so that you know how to make your skate box. There will not be any issues there. After reading all the parts of this article, you will know how to build a skateboard ramp for beginners. You can construct your faultless flat rail in no time, and you will not need a welder. A few planks of wood, a length of metal pipe, a few screws, and an hour or two of your time are all required.
Great job if you know how to weld a flat bar together and have the equipment to do it yourself. The problem is that only some people possess the knowledge or resources to do this. However, you still need to construct your flat rail. The procedure is straightforward. Please allow us to demonstrate.
Gather your Material
You should realize that there is not much involved in constructing this kind of flat rail and that it is straightforward. You will need a single piece of plywood, seven 2-by-4s measuring eight feet in length, a box of three-inch screws, and a box of two-inch screws.
The 9-foot metal pipe should be round with predrilled holes. Our steel pipe is an extra foot in length because we prefer the way it looks when it protrudes slightly beyond the building’s edge. It facilitates the escape from various grinders, including the Smith and the Feeble.
Build Your Frame With The 2x4s
It is going to be a breeze to get started on your build. The base of the rail should look like a pyramid, so stack your 2x4s in that configuration. While we chose to make our rail around 10 inches in height, you may experiment with other rail heights by modifying the size of your pyramid by adding or removing 2x4s.
Use the drill and 3-inch screws to join the 2x4s. Connect the pyramid’s framework with screws until it is robust. You know it is solid if you can pick it up and not feel any wiggles or vibrations.
Cut Your Pieces In Plywood
As it is the most technical step, you need to carefully calculate your pieces’ dimensions to ensure a good fit. Figure out the dimensions of the pieces you need, then sketch them on your plywood using your pencil.
Specifically, we will need two planks of wood measuring 11 by 96 inches (8 feet) to wrap the box’s sides and two triangles measuring 11 by 12 inches each to cover the corners.
Our side panels and triangles are 11 inches high as opposed to the 10 inches of our actual frame. Your structure needs that extra inch on every side to insert your pipe into a socket. The triangles are the same.
If you want to use them with our 10″ frame, you will have to trim them up to 11″. You should remove one inch from the peak of both triangles once you have them in hand. Doing so will provide you with a secure perch atop the building for your pipe.
Cover Your Frame With Your Wooden Panels
It is time to mount everything once the frame is finished and stable and the pieces of plywood have been cut to size.
This section is relatively easy. Put your plywood on either side of the construction, and then screw it to the 2x4s using the screws provided. Repeat the previous step with both of your triangles, placing them on either end of your flat bar.
It is irrelevant whether or not all of the 2x4s in the frame are touched by the side plywood. It must make contact at both the bottom and the top to provide you with secure screwing real estate.
Place The Pipe On Top Of The Structure
The final stage of the process, although by no means the least important. Now that you have your construction in the shape of a triangle, however, you will need something to prevent you from sliding or grinding.
If you have followed the stages that came before this one correctly, you should have a lovely and secure place to drop the pipe without the risk of it rolling on its sides. Position your pipe, so the holes are upward, and then screw that item into the top 2×4 of your frame.
Conclusion
Making a skateboarding rail is relatively easy in and of itself, particularly if you adhere to the methods I have outlined in the previous paragraphs. Before you begin, you should think about your skating technique and style and ensure that the rail you design will suit your tastes. We hope we can answer your question about how to build a rail for skateboarding by the time you finish reading this post.
FAQs
1. What materials are needed to build a rail for skateboarding?
You will need some 2×4’s (or other dimensions depending on the size you want), nuts, bolts, and washers. Additionally, you may also need sandpaper, power drill with drill bits, saws of different sizes (jigsaw, circular saw, miter saw), wood glue and screws.
2. How do I measure for the rail?
Measure out the area where you want to build the rail and make sure there is enough space for it. Once you have the measurements, cut your boards according to those dimensions using a saw of your choice.
3. What type of drill bits will I need?
You will need drill bits that are designed for wood such as spade bits or hole saws. Additionally, depending on what type of nut and bolts you use, you may also need a Phillips head bit or Allen wrench bit.
4. Is safety important when building a skateboard rail?
Absolutely. Make sure to wear protective eyewear and gloves when working with power tools. Additionally, keep a fire extinguisher nearby in case of any sparks or fires that may occur. Lastly, follow all safety guidelines provided by the manufacturer for your tools and materials.
5. What is the best way to finish the rail?
After you have assembled the rail, you can sand it down and apply a sealant or paint to make it look more attractive. Additionally, adding grip tape on top of the rail will help provide extra traction for skateboarders.