Painting on a skateboard is not just for the thrill-seekers. You want to know how to paint a skateboard deck. It’s also a fantastic summer project idea that will make your deck unique and bring it to life with artfulness.
Even if you don’t have any artistic abilities, there are plenty of creative ideas out in this world where anyone can get involved. All-inclusive kits allow beginners like yourself who lack some skills but still want something exciting enough without breaking their budget.
Go ahead and paint over those boring old logos from last year or add design elements from our featured artists at a total price; we know what they did well because these boards looked great when done too. Custom paintings could cost upfront as much as $100+, depending upon size.
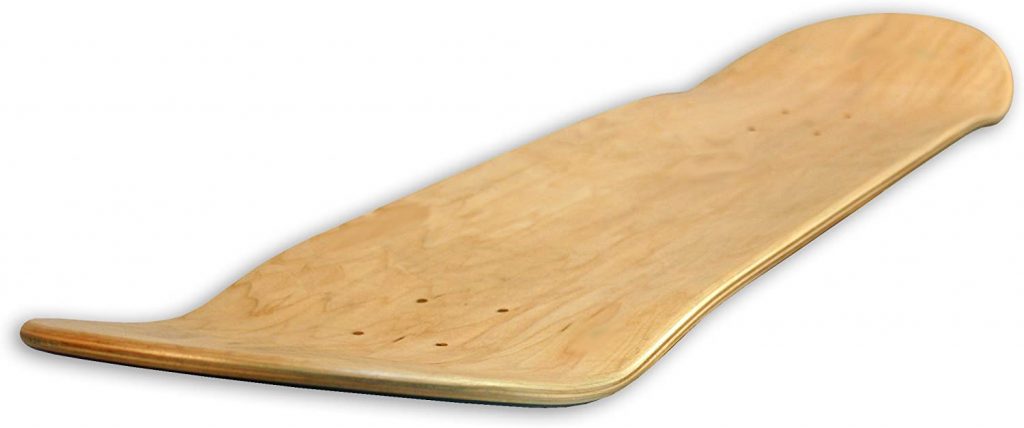
Get a Blank Skateboard deck and draw your favorite design on it.
Required Items
- Blank skateboard deck
- Paper/cardstock
- Frisket for making your stencils
- Paints – Acrylic or Spray
- Paintbrushes
- Face mask to cover nose and mouth
- Varnish to seal your design
- Disposable gloves
- Blue tape
- Table or surface covers
- APRON or old clothes
- Enclosed area for spray painting
- Paper towels
- Board mounts
- Trash can
Step 1: How should be the Working Area.

- Painting a board can be hazardous to your health. And I advise that you find some well-ventilated areas outside if possible. The spray paint will likely splatter all over or even yourself. If there isn’t enough space for it in the air around us.
- When working with boards on this enormous scale (vinyl), ensure ventilation is present and wear gloves. Hence, as not get any toxic chemicals into contact wounds where skin meets vinyl wall before taking time out afterward. Unless wearing old clothes, which we’re going ahead full steam ahead. Just because they happen to fit nicely inside those new shoes.
- It’s time to give your truck-less board a makeover. With the top facing down, wear protective gear like gloves and glasses. Then use an electric sander with 40 grit sandpaper on it for 15 minutes. Next up is 150grit, which takes 20 more minutes but will create smooth surface finishing. After that process has been completed by following these simple steps. Don’t let pressure unevenly pour out while doing so since this could help scratchboards as well.
- The finishing of your paintings will be more uniform, and they’ll look much better. After you finish cleaning the board. It is best to use a stiff bristle brush to remove any snow dust overlying. That might otherwise damage the smooth surface.
- Wire bristles are not recommended as this can cause scratches in some areas. Which would show up on paint later when applied with regularity from other brushes at different angles. During the application process or if hands become dirty while painting.
- A carpenter’s grade wood filling paste mixed at around 50% water by volume works nicely. Because we want something lightweight enough. So there aren’t too many bubbles forming under pressure. But still strong enough to hold its form through heating without expanding drastically.
- Now is the time to tape the side and top of the board with painter’s tape.
Step-2:Use of Primer
For a professional-looking finish, you should use an aerosol primer. Before applying the spray, make sure to shake and follow instructions for your primers.
Then wait 30 minutes before putting on a second coat, or otherwise it will not be even enough in some areas while leaving others to look worse than they did prior. It is where eye protection comes into play because there can still get toxic elements if chemicals aren’t used correctly, which could damage vision over time from exposure.
Using our general guidelines from above regarding cleaning supplies that are safe through proper hygiene practices (handwashing/medical masks), let’s explore how best to practice these tips at home without introducing harmful.
Sanding your primer is especially important to ensure any clumps, bubbles, or blisters are removed correctly before painting. When filing the 150-grit paper for a second time, be firm but try not to use too much force as this could cause inclusions on top of one another.
When the pressure gets intense towards the end of each pass with grits ranging from 180 – 220 depending on if you need it more rough or smooth finishing respectively.,
It would help if you always started small, so keep going until there’s no residue left after brushing off dust onto an old lint/t-shirt, then let dry overnight while leaving out the air during the process.
For a final touch, you can use an old cotton t-shirt to wipe the board’s bottom and prime the wood before spraying. This tack coat prevents paint defects by thinning it so that it cleans up nicely without leaving any residue on your masterpiece!
When doing this last step, be sure not to get any cleaner liquid onto other parts of our project as they may cause unwanted marks. Due to poor adhesion between layers during drying time or brush strokes from being too close together when applying the product evenly across the surface area.
Step-3: Deciding the Design
The first step of making a custom skateboard is painting the deck. The unpainted areas left behind by your stencils will form design on it, and you can make mistakes while applying paint because this process takes time.
So be prepared with plenty of paper towels or distress-worthy objects such as rags from previous projects. Next, use geometric shapes for more detailed looks; squares work well when triangles are combined horizontally and then vertical angles). Skaters who are just starting should use tape to create different types, like straight lines.
Step-4:Painting the Board
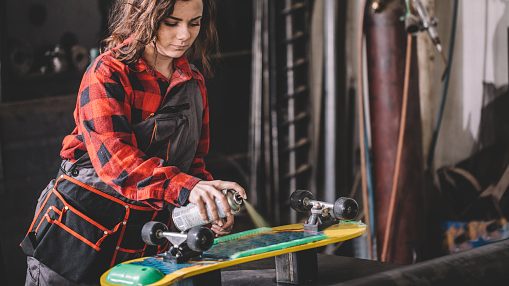
First, spray your base color onto the surface where you will be doing the stencil designs. Try to use intense contrast colors like white and black where all other colors are going to stand out more prominently.
Ensure that it is done correctly when spraying, so they’re covered smoothly with a tacky quality similar in texture to watercolor paint. It can only happen if one uses an aerosol spray[1] because this gives better finishing qualities.
When spraying the second layer of paint, make sure to keep it at least 12″ away from where you want color continuity. It can be tricky to get an even application with a stencil and tape between each letter or number, but practice makes perfect!
It would help if you let both coats dry before placing anything on top; otherwise, your text will get spattered all over again by mistake when that section comes up next time around (usually 24 hours).
After the paint has dried completely, give steady and firm pressure to pull your tap from the board. For doing this, you need tags hanging off its edge and stuck up for they easily be removed with tape; grab one end at an angle, so it doesn’t damage too much wood when detached.
Once free of all obstacles on both sides (for final cleaning), 220-grit sandpaper will make a smooth finish base. Just lightly sanding gets rid of any roughness leftover by applying more time-consuming steps if necessary until there’s no residue showing whatsoever before wiping clean using either old t-shirts/ rag, among others depending upon preference.
Final Verdict
No matter what your favorite color is, it’s a breeze to get new-looking boards with the right equipment. All you’ll need are some paint and brushes at home or nearby hardware store items. This article was helpful in consideration of knowing how to paint a skateboard deck for all.